I’m sure you’ve heard about the magic of highlighting and contouring, but you’ve probably discounted the makeup technique because it sounds and looks way too difficult. Well, you’re wrong! Contouring does not have to be hard. And it most definitely is not reserved only for the runway models. Contouring is for the everyday woman. This is contouring made easy so you can do it in your home too!
What is Contouring?
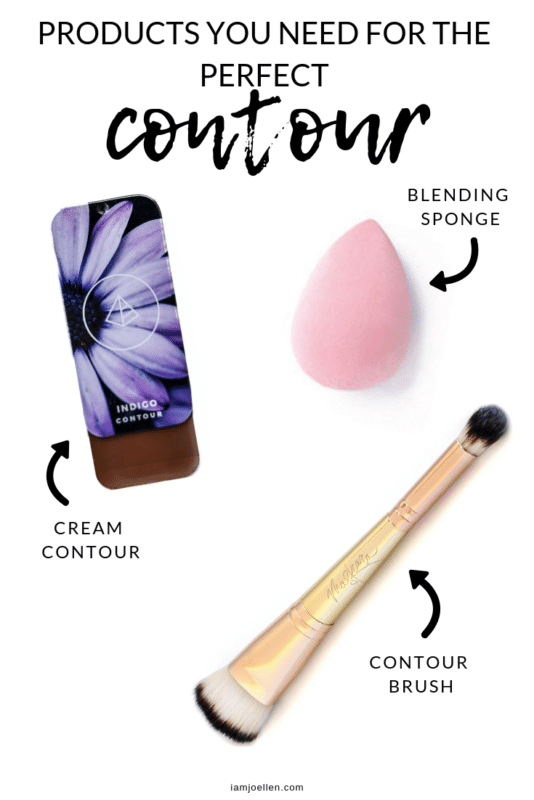
First off, what is contouring? Contouring is creating shadows on your face. When you look at a ball, it has shadows on the top, sides, and bottoms. Our faces do too! But when we apply an all-over foundation color, we take those natural shadows away and then our faces look flat! We want to bring those natural shadows back so we enhance our beautiful features. So, in a nutshell, contouring is basically adding shadows to your face to make it look more feminine and beautiful. Sounds simple, right? What You’ll Need To contour, you’ll only need 3 products: cream contour, a contour brush, and a blending sponge. These simple tools will help you achieve the beautiful look you want!
How to Contour
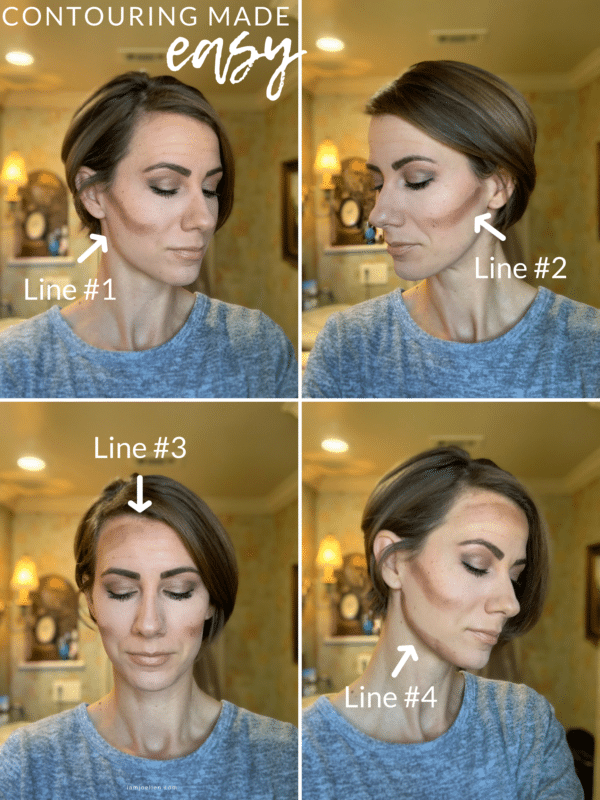
Now, there are lots of ways to contour. Runway models, actresses, and makeup artists make it a pure art form. But you, most likely, are not one of those types of women. I want to make contour easy for you! It should be simple and not overwhelming. Would you believe me if I said that you could contour your face by just drawing 4 lines?? Well, you can! When contouring, you want to focus on your cheekbones, your jawline, and your forehead.
So, what you need is a good contour color. Not a color that will look too orange or dirty brown. But a color that will look like a natural shadow. Any of these contour shades are prefect! Along with a good contour color is a good makeup brush. This brush is my absolute fave!! This is where the fun comes in! You’re going to draw 4 lines on your face: Take your contour color and your brush and draw a line right beneath your cheekbone…right in the hallow of your cheek. Start at your ear and follow your cheekbone to about the middle of your eye’s pupil.
Do the same thing on your other side. Then, let’s draw a line at your hairline on your forehead. Start on one side of your forehead and draw a line to the other side. Your fourth line is drawn on your jaw. Take your brush and start just below your ear and follow under your jawbone from one side of your face to the other.
The Magic of Blending
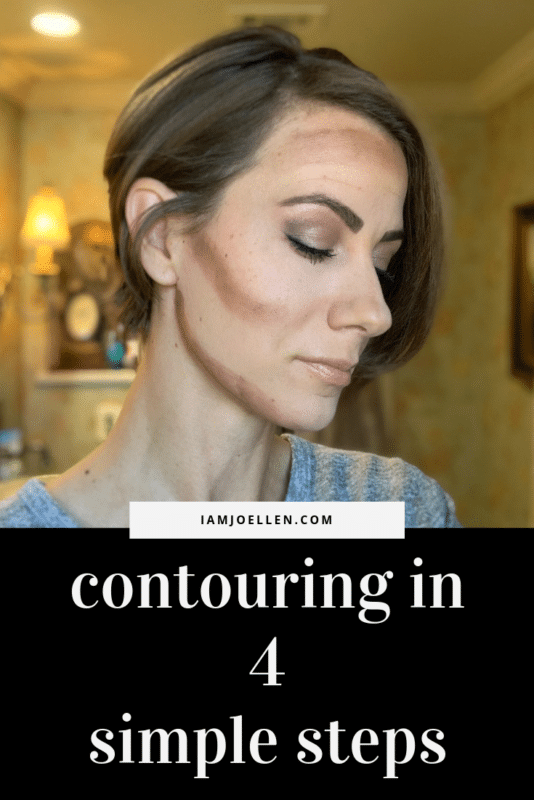
Now you look like an art project, right?! Don’t worry, we won’t leave you that way. Now you take the thicker end of your brush and blend those lines out! When blending your cheek area, blend upwards. We want to create a lifting effect on your face. Blend the line on your jawline too by rubbing it into the skin. When blending your forehead, blend into your hairline. You can finish your blending off by using the Perfector Sponge to give it a flawless finish. You don’t want any stark lines left on your beautiful face.
Now take a step back and take a look at your gorgeous contoured face! It has come to life! It looks more feminine! And it wasn’t even hard! Hopefully this simple process makes contouring easy for you. If you need help choosing a good contour color that will complement your skin tone, email me and I can help!

*This post contains affiliate links. If you purchase an item featured on this blogpost, I get a small portion from the sale. It doesn’t affect you at all. Thanks for your support!