How to Get Fuller, Natural-Looking Eyebrows After 40
If you grew up in the ’90s or early 2000s, there’s a good chance your eyebrows have been through some things.
We tweezed them. Then we tweezed them some more. And some of us are still waiting for those poor little hairs to come back.
Add in the natural changes that can happen to our brows as we get older, and suddenly the eyebrow routine we used in our 20s doesn’t work quite as well in our 40s.
But here’s the good news: You don’t need to draw on an entirely new eyebrow to make sparse brows look fuller. In fact, that’s exactly what I DON’T want you to do.
As a licensed esthetician and certified makeup artist, my goal with eyebrows for women over 40 is to work with the brows you already have. A little shaping, strategic trimming, some lift, and tiny hair-like strokes can make a surprisingly big difference.
My method comes down to five simple steps:
Boundaries. Tweeze. Trim. Lift. Fill.
Let’s walk through each one.
Why Eyebrows Matter So Much After 40
Brows frame your entire face. A beautiful brow can help define your eyes and give the face a more polished appearance…even if you’re wearing very little makeup everywhere else.
But brows can also become less full and defined with age. That’s when it’s tempting to grab a brow pencil and start coloring everything in. But please don’t.
The goal isn’t to create two dark, perfectly stamped eyebrows. The goal is to make your natural brows look like a better version of themselves. That’s why I shape first and fill last.
Step 1: Find Your Brow Boundaries Before You Tweeze
Before you pick up the tweezers, figure out where your brows should actually begin, arch, and end.
I call these your brow boundaries.
This is one of the most important steps because once you understand the basic shape you’re working toward, you’ll know which hairs belong and which ones don’t.
Where Should Your Eyebrows Start?
Take a brow pencil, makeup brush, or another straight tool and hold it vertically along the side of your nose.
Where that line meets your brow gives you a helpful reference for where the brow should begin.
Be careful not to remove too much from the inner brow. Brows that begin too far apart can change the proportions of the face and leave you with even more space you’ll feel like you need to fill in later.
Where Should Your Brow Arch Be?
Look straight ahead and use your facial features as a guide for finding the natural high point of your brow.
The exact placement will vary depending on your face and natural brow shape, so don’t force an exaggerated arch that isn’t naturally there.
But a good method is to take a makeup brush and place it at the bottom of your nose, angle it to the middle of your pupil, and right above that should be your highest point of your brow arch.
Where Should Your Eyebrow End?
Use your tool to create a diagonal line from the outer area of your nose toward the outer corner of your eye.
That gives you a helpful guideline for where the tail of your brow can end.
One thing I pay attention to on mature eyes is the direction of the brow tail. Extending your brow dramatically downward can visually pull the eye down with it. I prefer a natural-looking tail that defines the brow without creating a long, droopy endpoint.
Makeup Artist Tip:
Mark your three brow boundaries before you start tweezing. It’s much easier to remove another hair later than it is to put one back. Trust every woman who survived the skinny-brow era on that one.
Step 2: Tweeze Conservatively
Once you’ve established your boundaries, you can clean up the shape.
The key word is clean up.
We’re not trying to completely reshape your brows with tweezers. Remove obvious stray hairs that fall outside your desired shape, particularly between the brows and underneath the brow where you want a cleaner line.
Then STOP. Seriously. Put the tweezers down.
When you’re already dealing with sparse eyebrows, every hair matters. Over-tweezing only creates more work for you when it’s time to fill them in.
I also recommend stepping back from the mirror periodically. When your face is two inches from a magnifying mirror, that one little hair can look incredibly important. From normal conversational distance? No one can see it.
And if this process is too intimidating for you, invest in going to get your brows professionally shaped. It’w worth the money!
Step 3: Trim Long Brow Hairs…But Don’t Overdo It
Next, brush your brow hairs upward so you can see their natural length.
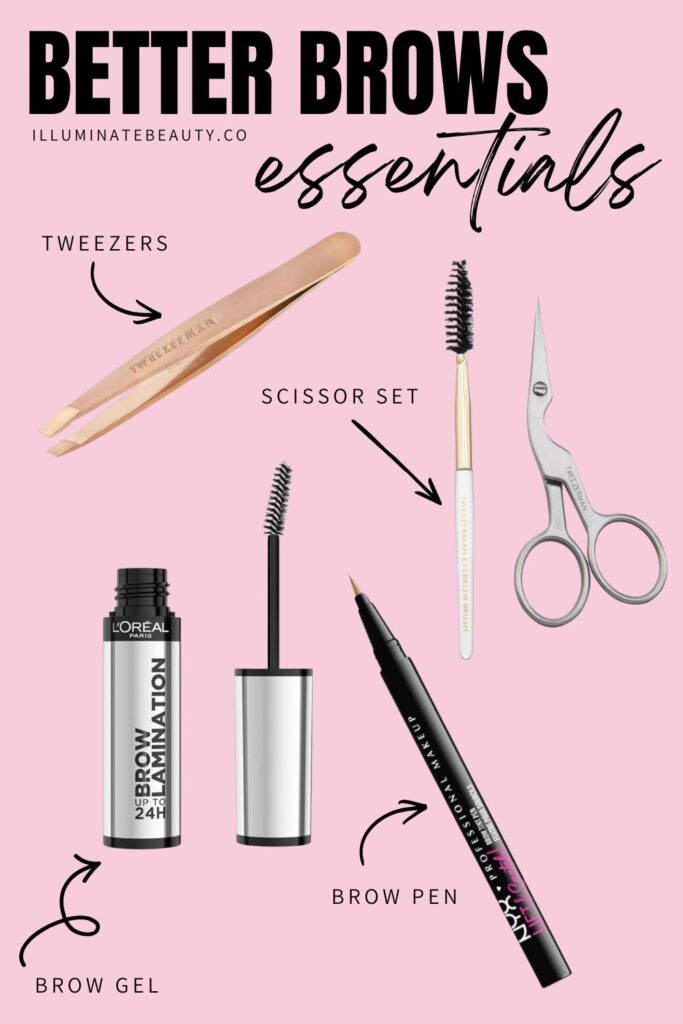
If you have a few hairs that extend significantly beyond the shape of your brow, carefully trim the excess with small brow scissors. You don’t need to give every single brow hair the exact same haircut.
Over-trimming can actually make sparse eyebrows look even more sparse because you’ve removed some of the length that helps create the appearance of fullness.
Trim the obvious spider legs and leave the rest alone. You’re looking for polished…not perfect.
Step 4: Use Brow Gel to Lift Sparse Eyebrows
This is where things start getting really good.
Before I start drawing in missing hairs, I like to see what I can accomplish with the hairs I already have.
Brush your brows upward and slightly outward with brow gel. That simple change can instantly make brows look fuller and more lifted.
And here’s why I like doing the gel BEFORE filling: Once the hairs are lifted into place, I can clearly see where the actual sparse areas are. Instead of filling the entire brow, I only have to add makeup where something is missing.
Less brow makeup = a more natural-looking brow.
For women over 40, that softer finish can be especially flattering.
Step 5: Fill Sparse Areas With Hair-Like Strokes
Now we’re ready for the brow pen. And this is where I see one of the biggest eyebrow mistakes:
Coloring in the entire eyebrow.
If you want your brows to look natural, don’t think of your brow pen like a Sharpie marker. Think of it as a way to create individual brow hairs.
I use a fine-tip brow pen and make tiny, light strokes in the same direction my natural hairs grow.
If there’s already hair somewhere? I don’t necessarily need to put more product there.
If there’s a little gap? That’s where I’ll add a stroke or two.
If the tail is sparse? I’ll create a few tiny hairs to give it definition.
The goal is that when someone looks at your eyebrows, they can’t immediately tell which hairs are real and which ones you created.
That’s the secret to filling in sparse eyebrows without making them look drawn on.
Follow the Direction of Your Natural Brow Hair
Another small detail that makes a BIG difference is the direction of your strokes.
Brow hairs don’t all grow in exactly the same direction. Toward the front of the brow, the hairs often grow more vertically. As you move through the brow, they gradually begin growing outward. Your brow-pen strokes should mimic that pattern.
If you draw identical horizontal lines across the entire brow, they’ll look like drawn-on lines. Vary the length and direction slightly so your strokes mimic actual hair.
Don’t Make the Front of Your Brows Too Dark
If there’s one place where I’d rather you use too little product than too much, it’s the very front of your brows.
A dark, square inner brow can immediately make the entire eyebrow look artificial. Keep the front softer. You can add a few fine upward strokes where you’re sparse, but don’t create a solid block of color.
Remember: Your eyebrows should frame your face…not enter the room before you do.
Choose a Brow Color That Looks Natural
Going too dark can make sparse brows look harsher rather than fuller. You want enough contrast to define your brows without making them look obviously painted on.
Your ideal shade depends on your natural brow hair, hair color, skin tone, and the overall look you prefer.
When in doubt, I’d rather build a softer color gradually than start with something extremely dark and try to tone it down. And don’t feel like both brows need to look perfectly identical. They’re sisters…not twins.
My 5-Step Method for Eyebrows Over 40
If all of that feels like a lot to remember, here’s the entire routine:
1. BOUNDARIES
Find where your brows should begin, arch, and end.
2. TWEEZE
Remove obvious stray hairs without over-plucking.
3. TRIM
Brush the hairs up and carefully trim only excessive length.
4. LIFT
Use brow gel to brush your natural hairs upward and outward.
5. FILL
Use a fine brow pen to add individual hair-like strokes only where you’re sparse.
That’s it.
You don’t need five different brow products or an elaborate routine.
Work with the hair you have first. Then fake only what you’re missing.
Common Eyebrow Mistakes That Can Make Sparse Brows Look Less Natural
If you’re struggling with sparse eyebrows makeup, check to see if you’re doing any of these:
- Over-tweezing the brow
- Trimming too much length
- Filling in the entire eyebrow instead of just sparse areas
- Making the front of the brow too dark or square
- Using a brow shade that’s too harsh
- Drawing long lines instead of individual hair-like strokes
- Extending the tail too far downward
- Trying to make both eyebrows perfectly identical
Usually, getting better brows isn’t about adding MORE makeup. It’s about being more strategic with what you’re already doing.
Do You Apply Brow Gel Before or After Brow Pen?
You can use brow products in different orders depending on the formulas you prefer, but for my method, I like using brow gel first.
Why? Because I want to lift and position my natural hairs before deciding where I need to add fake ones. Once my brows are brushed into place, the sparse areas become much easier to see. Then I can use my brow pen strategically rather than filling everything.
This is especially helpful if your brows look sparse when they’re lying flat but appear surprisingly full once they’re lifted.
What Is the Best Brow Product for Sparse Eyebrows?
For the most natural-looking result, one of my favorite tools is a fine-tip brow pen.
The precision allows you to create small strokes that resemble individual hairs rather than filling the brow with one solid block of pigment.
I also love pairing it with a good brow gel. For me, those two products do most of the heavy lifting:
Brow gel = lift and hold.
Brow pen = believable fullness.
Eyebrows for Women Over 40: Frequently Asked Questions
- Why do eyebrows get sparse as you age? Brows can appear thinner over time for a variety of reasons, including changes in the normal hair-growth cycle and years of grooming or over-tweezing. If you experience sudden or significant eyebrow hair loss, especially along with other symptoms, it’s worth discussing with your healthcare provider rather than assuming it’s simply aging.
- How do you fill in sparse eyebrows and still make them look natural? Start by brushing your existing brow hairs into place. Then use a fine brow pen to create small, hair-like strokes only in the areas that need more fullness. Avoid coloring in the entire eyebrow with one solid layer of pigment.
- Should women over 40 have thicker eyebrows? There isn’t one perfect eyebrow thickness for every woman over 40. The most flattering brow usually works with your natural hair growth, facial proportions, and features. Instead of chasing a brow trend, focus on creating a balanced, softly defined shape that looks natural on you.
- How can I make sparse eyebrows look fuller without looking fake? Start with brow gel. Brushing the hairs upward can help maximize the fullness you already have. Then add fine brow-pen strokes only where there are visible gaps. Using less product and mimicking natural hair growth usually creates a more believable result.
- Should you use a brow pencil or brow pen for sparse eyebrows? Both can work, but I especially like a fine-tip brow pen when you need to recreate individual hairs. A traditional pencil can be wonderful for soft shading and definition, while a fine brow pen makes it easier to create precise, hair-like strokes.
- Should brow gel go on before or after filling in your eyebrows? Either method can work, but I prefer brow gel first for sparse eyebrows. It allows me to lift my existing hairs and see exactly where I’m missing fullness before I add brow-pen strokes.
- How do you shape eyebrows for mature eyes? Start with your natural brow structure and use your facial features to identify the beginning, arch, and endpoint. Avoid over-tweezing or forcing an exaggerated shape. I also pay attention to the brow tail because extending it dramatically downward can visually pull the eye area down.
- Can you make sparse eyebrows look fuller without microblading? Absolutely. Strategic shaping, brow gel, and a fine brow pen can create a significant difference without permanent makeup. The key is creating the illusion of individual hairs instead of drawing a solid eyebrow.
Better Brows After 40 Don’t Have to Be Complicated
If your eyebrows aren’t as full as they used to be, your answer doesn’t have to be drawing on darker, heavier brows. In fact, I’d do the opposite.
Shape less. Keep more hair. Lift what you have. Fill only what’s missing.
Remember my five steps:
Boundaries. Tweeze. Trim. Lift. Fill.
Once you get the shape right, the actual makeup portion can take just a couple of minutes. And that’s what I want makeup to be for women in our 40s and beyond.
Not a way to hide our age. Not a list of rules telling us what we’re no longer allowed to do. Just a few updated techniques that help us work with the face we have now and feel beautiful in the skin we’re in. Because better brows don’t require MORE makeup. They just require a better strategy.
Here are other blogposts you might enjoy:
- The Complete Olive Rose Makeup Guide: Shades, Finishes & What to Buy First
- The Best Needle-Free Skincare for Aging Gracefully
- Is Oliveda Worth It for Mature Skin? An Honest Guide Before You Buy
- At Home Microneedling for Mature Skin — A Licensed Esthetician’s Complete Guide to the Seranova System
- Eyeshadow Tips for Deep Set Hooded Eyes
- How to Apply Makeup Over 40: Step-by-Step Guide for Mature Skin

About the Author
JoEllen is a licensed aesthetician, certified makeup artist, and certified John Maxwell coach, speaker, and trainer. She works with women helping them look and feel confident. She loves teaching women simple beauty techniques so they can feel empowered to try it at home. Her motto is that when you look and feel good, you do good!

*This post contains affiliate links. If you choose to purchase an item featured, I receive a small portion from the sale. Thank you! It does not affect you at all.

